

Summer Break Chronicles: The Grown-Up Edition
So, this summer I’ve taken on a thrilling new adventure… organizing my house. Riveting, right? Before you judge, remember: my glamorous schedule consists of bouncing between 2-3 days at my mom’s, then back home for my “days off,” which are sprinkled generously with doctor appointments. (I know, calm down with the envy.)
Technically, I should be working on “work stuff”… but plot twist: I’m on leave. And I’ve decided to actually leave the guilt behind, too. Revolutionary, I know.
Now, what do you do when your kids are older, no longer into glue sticks, zoo trips, or snack-time negotiations? Sure, I miss those days—heck yes I do!—but these teens are out living their best lives, working jobs, lounging with friends, and generally not asking me to make popsicle stick puppets.
So here I am—caught between “I deserve to rest” and “shouldn’t I be doing something productive?” Because as much as I’d like to just vibe all day… I start twitching if I sit still for too long. Has anyone else caught the productivity guilt bug?
Welcome to Another Episode of “Steph’s ADHD Project Parade”!
(Sarcastic inner monologue fully engaged—imagine it narrated by someone juggling three tabs open in her brain and holding a half-drunk iced coffee.)
So, yes, as previously mentioned, I decided this summer was finally the time to organize the house. Logical. Noble. Slightly delusional.
To be fair, we’ve moved so many times over the past 21 years as a family, my garage has turned into a living museum of “things that didn’t work in this house but might be future treasures in my next house.” Do I purge? Rarely. I box, I stack, and I hope—like an optimistic squirrel with a hoarding habit.
And honestly, thank goodness for my husband—patient, kind, and totally nonjudgmental about my sentimental stash of decorative whatnots and mystery cords. THANK YOU, SWEET JESUS, for that man.
Anyway, we’ve been in this house for two years now. It’s time. Things need refreshing—kitchen cabinets, home office/craft area, my closet, and of course, the living room.
So where do I start?
The back patio, naturally. Because why begin indoors when I can completely derail the plan with a spontaneous trip to Home Depot with the girls for string lights and flower pots? Plot twist: I’m not even mad about it.
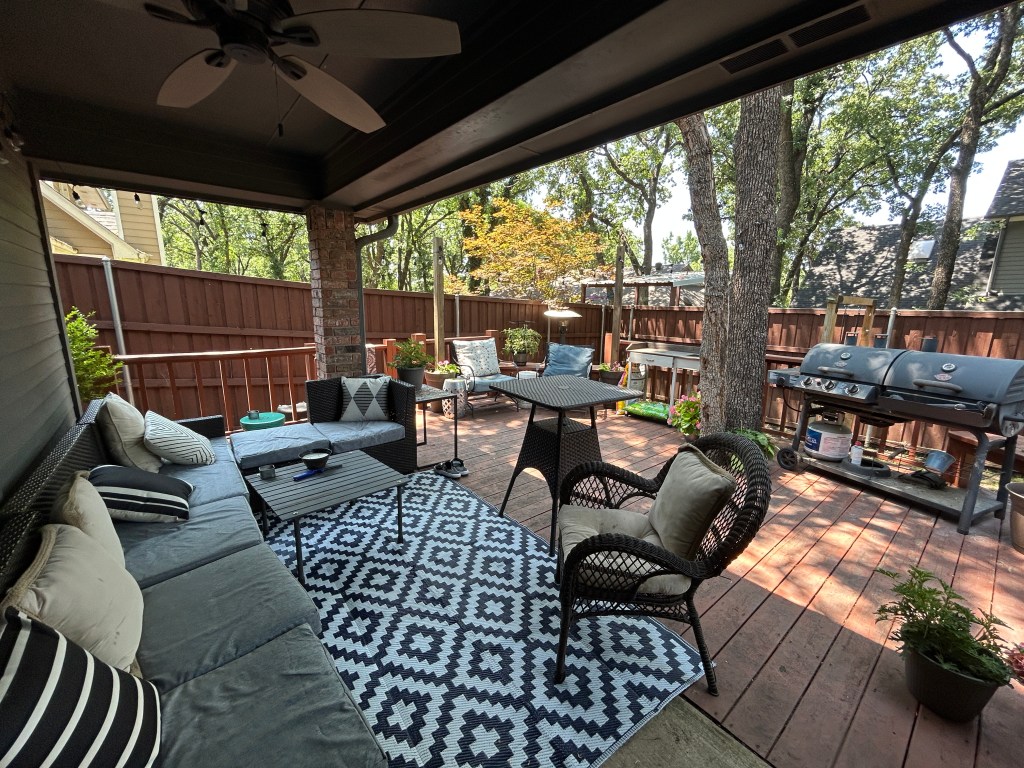
We built flower planters, hung lights, planted flowers, and after two years of staring at a to-do list, I’ve finally made my little backyard vision board come to life. I even dusted off the outdoor rug and lights I bought forever ago, hiding in plain sight (read: the garage).
Is it magazine-worthy? No.
Did I spend thousands? Also no.
My budget was $200 and vibes.
Our town is full of perfectly curated outdoor spaces designed by professionals with names like Chase and Delilah, my humble DIY setup doesn’t exactly scream “landscape luxury.” But guess what? I love it. And that’s enough.
It’s cheerful. It’s me. And most importantly: it makes me happy. Friendly reminder: if it makes YOU happy, it’s beautiful. You don’t need a designer price tag to feel proud of your space.
Now, do I wish I had some before pics to show the glow-up? Of course. But here we are—living in the “after” with twinkle lights overhead and flowers blooming in planters my girls helped me build. (Yes, tears were shed. No, I will not apologize.)
A quick note: we’re renters right now, so everything had to be movable and removable. I tackled this over two weeks, squeezing in online shopping while waiting at doctor’s appointments for my many patients, because they always come in pairs. Nothing like impulse-buying throw pillows from a waiting room, right?
Now let’s talk patio furniture.
I bought our set years ago from Pier 1 (RIP). Since then, finding cushions that actually fit has been a nightmare. Also, Texas squirrels apparently have a personal vendetta against my patio pillows.
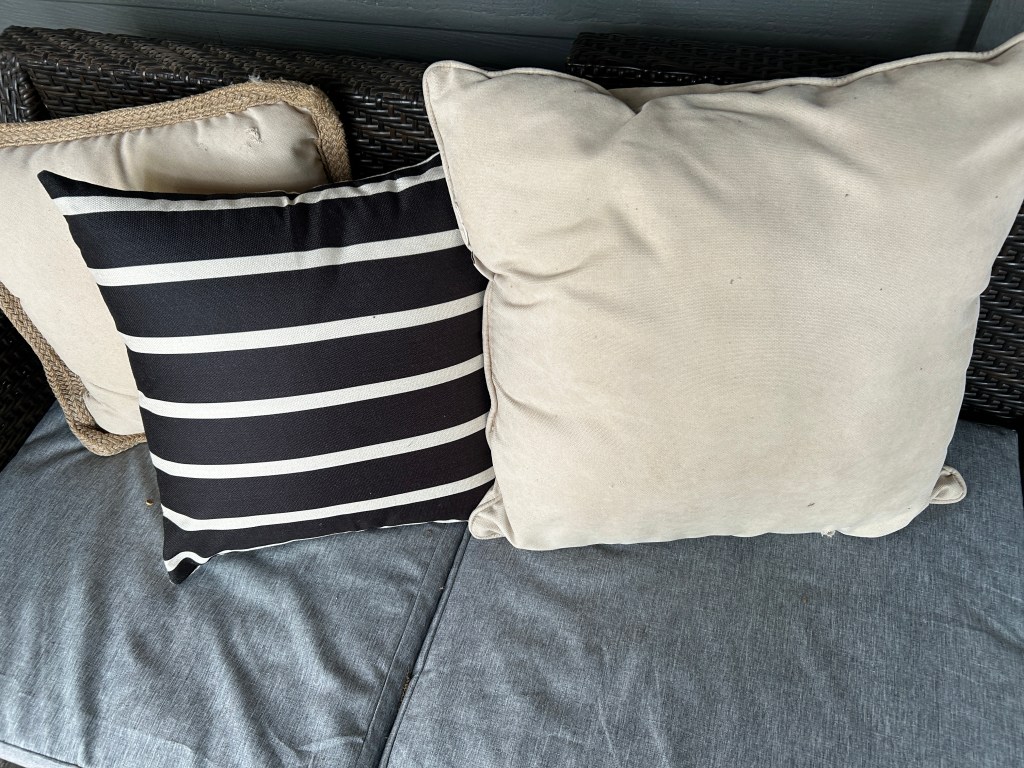
But! A magical company is now making affordable slipcovers that actually fit my existing cushions. Hallelujah. I ordered one set, loved them, and will likely grab another to swap out as my mood swings demand. Tossed in some new throw pillows, too. Still on the hunt for a few pops of color—maybe during my next mom shift, I’ll do some retail therapy… for the patio, obviously.
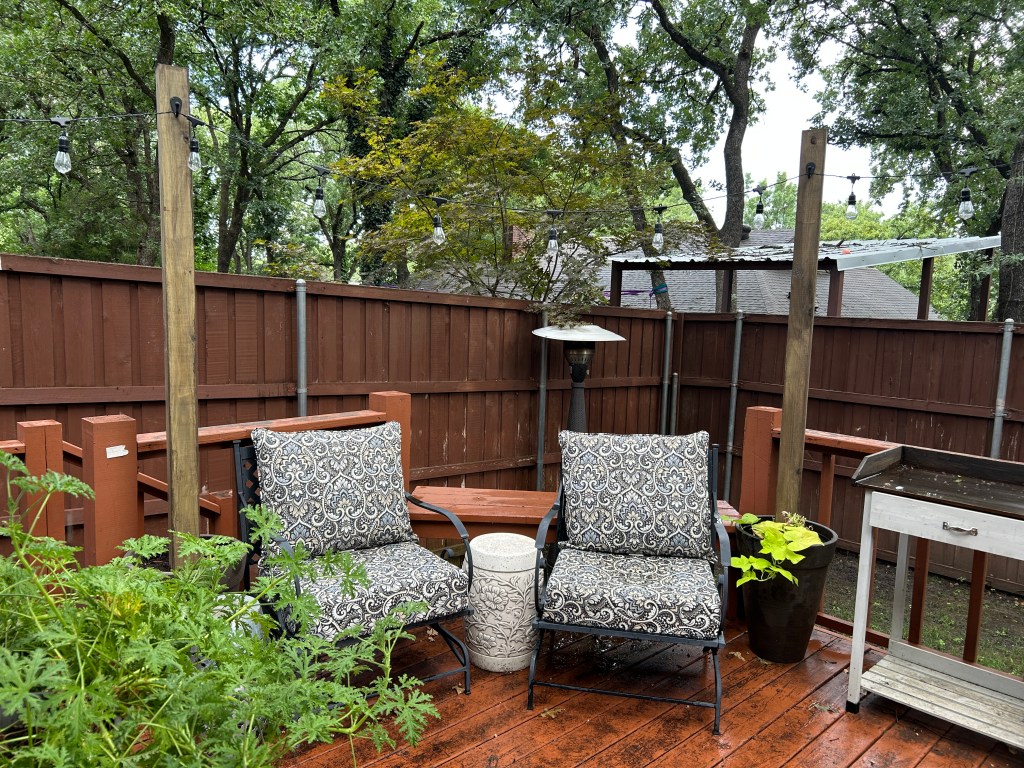
And can we just take a second to appreciate the planters with 4×4 posts we built to hang the lights? They turned out amazing. My girls were rockstars helping me bring the vision to life. I’m seriously so proud of how it turned out.
Now for the DIY nerds out there: here’s how we made our string light planters—and what I’d tweak if I did it again.
I’d pinned, oh, maybe 10 versions of this idea: big planters, poles, string lights—boom, cozy vibes. Most tutorials used cement to anchor the poles, sometimes even PVC inserts to allow for umbrella swaps. But cement = permanent + heavy. And I wasn’t ready to commit that hard.
So instead, we went with 50 lbs of play sand per planter, topped with potting soil and flowers. Y’all, it’s held up through Texas-size storms, downpours, hail, and gusty wind. The sand is doing its job, and the planters (tall and narrow) are holding steady.
We used flat-bottom 4x4s for the posts, which definitely helped with stability.
Here are two amazing tutorials that inspired me, with step-by-step goodness:
🪴 Jenna Sue Design Co. Planters
🌿 H2O Bungalow Planter + Umbrella Stand
That said—if your area is windier or wide open, cement might be the safer route. If I were starting from scratch, I might go with wider pots and cement for more security. But for our tree-covered, tucked-away little corner? Sand works great.
This summer has been full of surprises, not just in the garden. My mom is slowly getting better, but still needs us nearby for now. We’re hoping by July things will settle into a new rhythm—her more independent, me a bit more back to “normal,” whatever that is.
Next stop on the organization train: kitchen overhaul! Out with the plastic, in with the glass storage containers. Wish me luck—I’ll probably get distracted and end up reorganizing the spice rack instead. Stay tuned.

Leave a comment